
Winding a BobbinUpdated 2 months ago
How to wind a bobbin can vary somewhat from machine model to machine model, so it’s best to consult your machine manual for the specifics regarding your machine. However, there are some general tips to keep in mind before you begin to wind your bobbin.
Improperly threading your bobbin can cause poor stitch quality and bobbin thread breakage.
Always use the same style of bobbin as that which comes with your machine. Don’t substitute. For example, if your machine comes with a Class 15 transparent bobbin, use only that style – don’t substitute for Class 15 metal bobbins. Likewise, if your machine comes with a Class 15 metal bobbin, don’t replace with transparent bobbins. Your machine is designed to use the style of bobbin that comes with it.
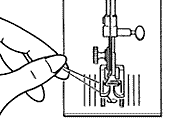
When you place the thread into the machine’s bobbin winding tension disk, make sure that it is placed snuggly between the disks. This is important so that the bobbin thread winds with the correct tension. If the bobbin thread is not placed snuggly between the disks, the thread will wind very loosely on the bobbin, resulting in poor stitch quality when you start to sew. Check your machine manual for details on how to correctly place the thread into the tension disks for your specific machine model.
Some Examples:
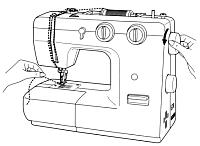
How to wind a bobbin depends on the type of machine you have. To help you find the right set of instructions, please select your machine type below.
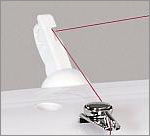
My machine has this type of thread guide on top:
My machine has this type of thread guide on top:

Raising a Bobbin Thread
1. Turn the power off.
2. Raise the needle.
3. Raise the presser foot.
4. Hold the needle thread.
5. Turn the handwheel towards you lowering, then raising the needle.
6. Gently pull needle thread to raise bobbin thread.
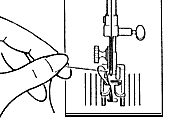
7. Open loop.
8. Pull both threads back.
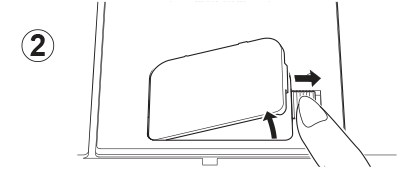
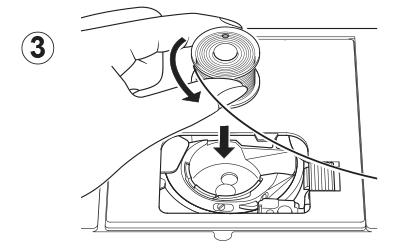
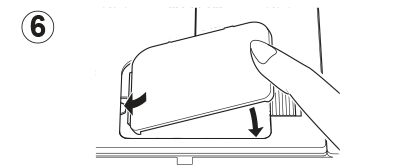
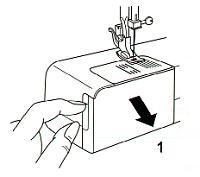
Inserting a Bobbin - Top Drop-In Bobbin
1. Raise the needle to its highest position by rotating the hand wheel toward you.

2. Remove the bobbin cover plate by pushing the release button to the right. Bobbin cover will pop up sufficiently to allow you to remove the cover.
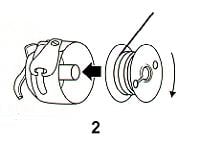
3. Insert the bobbin making sure the bobbin rotates counterclockwise when you pull the thread.
NOTE: This is a very important step as the bobbin can become unthreaded and cause sewing problems if it rotates clockwise.
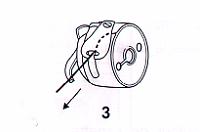
4. Pull the thread through the slot (A) and then to the left.

5. With a finger held gently on top of the bobbin, pull the thread until it stops in the slot (B). Then pull about 6" (15 cm) of thread and lead it towards the back of the machine under the presser foot.
NOTE: This is also a very important step to assure the bobbin thread does not slip out of position.

6. Replace the bobbin cover plate onto the needle plate.
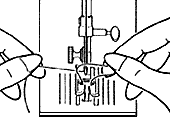
Inserting a Bobbin - Front Load Bobbin
Step-by-Step: Inserting a Front-Load Bobbin
1. Raise presser foot.
2. Turn hand wheel toward you until the needle is in its highest position.
3. Open the hinged cover.
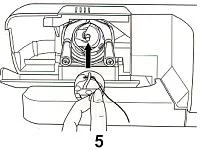
4. Hold the bobbin case with one hand. Insert the bobbin so that the thread runs in a clockwise direction.

5. Pull the thread through the slit and under the finger.
6. Hold the bobbin case by the hinged latch.
7. Insert it into the shuttle.