
Using an Automatic Needle ThreaderUpdated 3 months ago
Ready to start using your automatic needle threader? Find step-by-step instructions for using an automatic needle threader here.
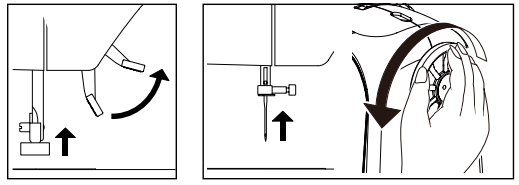
Be sure to raise the presser foot lifter and raise the needle to its highest position before threading.
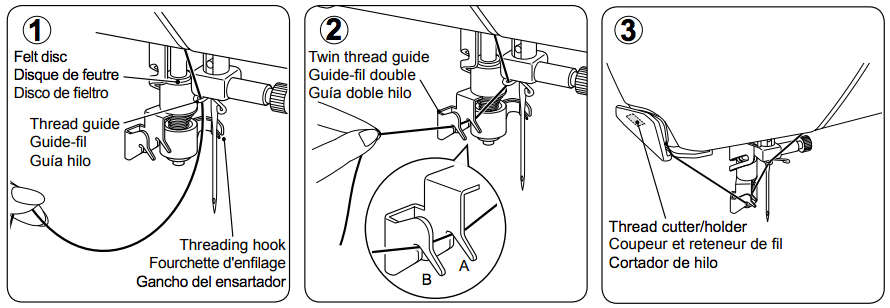
- Thread the machine with your left hand while gripping the thread with your right hand. Hook thread to the thread guide on the needle bar and pull it toward you leaving about 4” (10 cm) clear.
- Hook thread to the twin thread guide (A and B).
- Pull thread gently into the thread cutter/holder to cut and hold it in place. Don’t pull thread with strong force or thread may be pulled off from needle hole after threading.
- Pull down the threading lever to its lowest position until the twin thread guide rotates and stops. Make sure that the guide doesn’t touch fabric, etc.
- Release the threading lever and needle will be threaded automatically. If the threading lever should not return to the original position, raise it gently by hand.
- Pull thread loop away from you. If the needle has not been threaded correctly, rethread from step 1.
NOTE: For smooth threading, it is recommended that the machine is set for straight stitch (in center needle position) when using the automatic needle threader. A heavy thread cannot be threaded through a fine needle. Don’t lower the threading lever while the machine is in operation or the threading hook may be broken.
IMPORTANT: If the needle cannot be threaded due to the nature of thread, manually thread the needle after hooking thread to the thread guide on the needle bar.