
How do I thread my Emerald, Onyx, or E10/E20?Updated 3 months ago
Your Husqvarna Viking Emerald, Onyx or E10/E20 sewing machine is easy to thread!
Spool Pin
Your machine has two spool pins, a main spool pin and an auxiliary spool pin. The spool pins are designed for all types of thread. The main spool pin is adjustable and can be used both in a horizontal position (the thread reels off the spool) and a vertical position (the thread spool rotates). Use the horizontal position for regular sewing threads and the vertical position for large spools or specialty threads.
Main Spool Pin
Place the thread spool on the spool pin. Make sure that the thread reels off the spool counter clockwise and slide on a spool cap. Use a spool cap slightly larger than the thread spool.
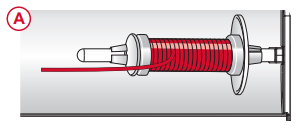
For narrow thread spools (A), use a smaller spool cap in front of the spool.
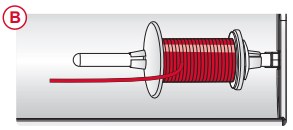
For large thread spools (B), use a larger spool cap in front of the spool.
The flat side of the spool cap should be pressed firmly against the spool. There should be no space between the spool cap and the thread spool.
Note: Not all thread spools are manufactured in the same way. If you experience problems with the thread, turn it in the opposite way or use the vertical position.
Auxiliary Spool Pin
The Auxiliary Spool Pin is used when winding a bobbin thread from a second spool of thread or when sewing with large spools or with specialty threads.
1. Insert the Auxiliary Spool Pin into the designated hole at the top of the machine (A). 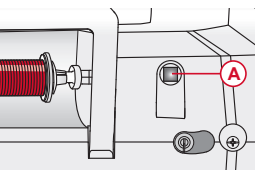
2. Place a felt pad under the thread spool. This is to prevent the thread from reeling off too fast.
Do not place a spool cap on top of the spool pin as that would prevent the spool from rotating.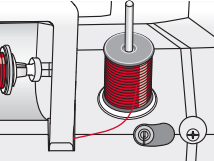
Threading the Upper Thread
Important! Make sure that the presser foot is raised and the needle is in its highest position by turning the handwheel toward you. This is very important to help ensure that the machine is correctly threaded. Not doing so can result in poor stitch quality when you start to sew.
1. Place the thread on the spool pin and fit the appropriately sized spool cap.
2. Pull the thread into the thread guide (A) from front to the back and thread guide (B) from back to front. Pull the thread between the tension discs (C).
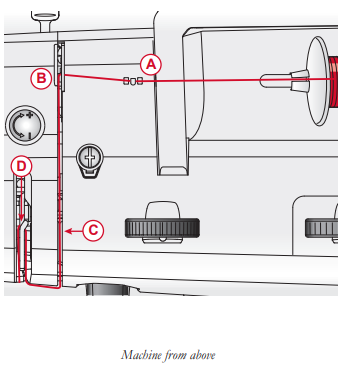
3. Continue bringing the thread down through the right threading slot, around the U-turn, then back upwards through the left threading slot.
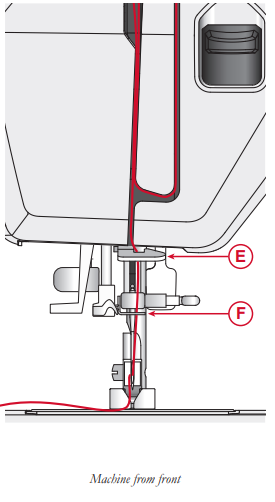
4. Bring the thread from the right into the take-up lever (D)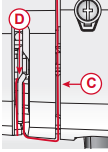
and down in the left-hand threading slot, into the lower thread guide (E) and to the needle thread guide (F).
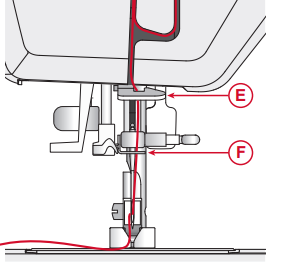
5. Thread the needle from front to back